I recently wanted to try Wordpress and explore its features.
For this I chose to install it an all its dependencies in a Vagrant box.
I followed the official install instructions and automated everything in provisioning shell scripts.

Running Wordpress requires a web server, php support and a MySQL database.
I chose use Ubuntu as the box operating system. As a web server I chose to use the Apache HTTP Server.
My provisioning strategy consisted of two shell scripts.
The first script called provision_once.sh is run only upon the box creation, and has privileged user rights. The second script called provision_always.sh is ran each time the box starts with a non privileged user rights.
This is specified in the Vagrant configuration file as follows:
config.vm.provision "shell", path: "vagrant/provision_once.sh"
config.vm.provision "shell", path: "vagrant/provision_always.sh", run: "always", privileged: "false"
The first part of provision_once.sh script installs required dependencies listed above:
apt-get -qq -y update
apt-get -qq -y install apache2
apt-get -qq -y install php5
apt-get -qq -y install php5-mysq
After installing the MySQL server, I needed to configure it, and create the required Wordpress database.
To setup the root password for the MySQL server in attended way, one can use debconf-set-selections as shown below. I chose to go with no password as I was setting this up just for test purposes.
But this would have been too simple, as I expected the unexpected happened. The installation of the MySQL server didn’t go as planned. The MySQL server was failing to start. The failure was only happening upon the box creation, doing manually the same steps was installing the MySQL server correctly.
After several attempts the only workaround I found was to perform the installation twice in the provisioning script:
for i in {1..2}
do
    debconf-set-selections <<< 'mysql-server mysql-server/root_password password '
    debconf-set-selections <<< 'mysql-server mysql-server/root_password_again password '
    apt-get -qq -y install mysql-server
done
Creating the database is rather straight forward using the MySQL command-line tool:
mysql -uroot -e "CREATE DATABASE $DBNAME"
mysql -uroot -e "GRANT ALL PRIVILEGES ON $DBNAME.* to '$DBUSER'@'localhost' IDENTIFIED BY '$DBPASSWD'"
mysql -uroot -e "FLUSH PRIVILEGES"
Next I needed to automate the download and the configuration of the Wordpress instance.
The part shown below will download and expand the latest Wordpress version from the official site. It’ll also configure Wordpress to use the MySQL database created earlier and generate the required authentication salts.
cd /vagrant
wget -q https://wordpress.org/latest.tar.gz
tar -xzvf latest.tar.gz
rm -f latest.tar.gz
cd wordpress
cp wp-config-sample.php wp-config.php
sed -i.bak -u "s/database_name_here/$DBNAME/g" wp-config.php
sed -i.bak -u "s/username_here/$DBUSER/g" wp-config.php
sed -i.bak -u "s/password_here/$DBPASSWD/g" wp-config.php
for i in {1..8}
do
    NEW_UUID=$(cat /dev/urandom | tr -dc 'a-zA-Z0-9' | fold -w 64 | head -n 1)
    sed -i.bak -u "0,/put your unique phrase here/s//$NEW_UUID/" wp-config.php
done
Finally I needed to point the Apache HTTP Server to the Wordpress site, this can be achieved as follows:
sed -i.bak -u 's,/var/www/html,/vagrant/wordpress,g' /etc/apache2/sites-available/000-default.conf

echo '<Directory /vagrant/wordpress>' >> /etc/apache2/apache2.conf
echo '  Options Indexes FollowSymLinks' >> /etc/apache2/apache2.conf
echo '  AllowOverride None' >> /etc/apache2/apache2.conf
echo '  Require all granted' >> /etc/apache2/apache2.conf
echo '</Directory>' >> /etc/apache2/apache2.conf

service apache2 restart
The provision always script is simple, it just make sure that the MySQL is up running upon the box start-up.
if [[ ! "$(sudo service mysql status)" =~ "start/running" ]]
then
    sudo service mysql start
fi
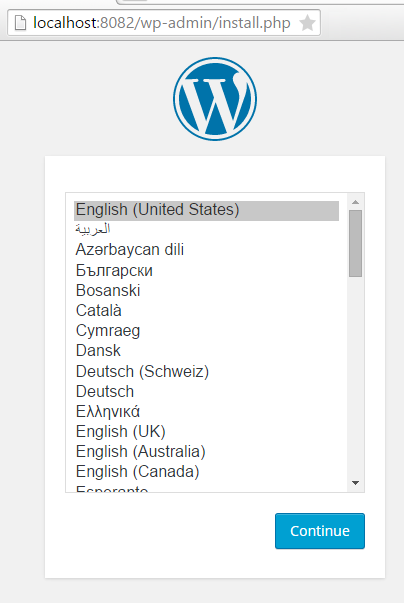
Finally redirecting the port 80 to the host, makes the Wordpress instance accessible from the browser, and ready to use.

The complete configuration is available at my wordpress-vagrant GitHub repository.